Channels

Connect WhatsApp, Instagram, Messenger, Telegram and email to the same inbox.

Connecting your WhatsApp Business number

One click: choose your number in Meta's window — the token and message subscription are set up for you.

You don't need to open Meta's developer dashboard or copy any tokens to connect WhatsApp. Your dashboard takes you to Meta's own connection window; you choose your number there, and the access token, message subscription and number registration are handled automatically.

  1. In your dashboard, open Settings → Channels and choose the WhatsApp card.
  2. If you have more than one site, pick the site whose inbox should receive the conversations from the list next to the button.
  3. Click “Connect WhatsApp” — Meta's window opens.
  4. Sign in with your Facebook account, choose your business account, then choose the number you'll use or add and verify a new one.
  5. Approve the permissions and finish every step. When the window closes, the number shows up as “Connected” in the “Connected channels” list.
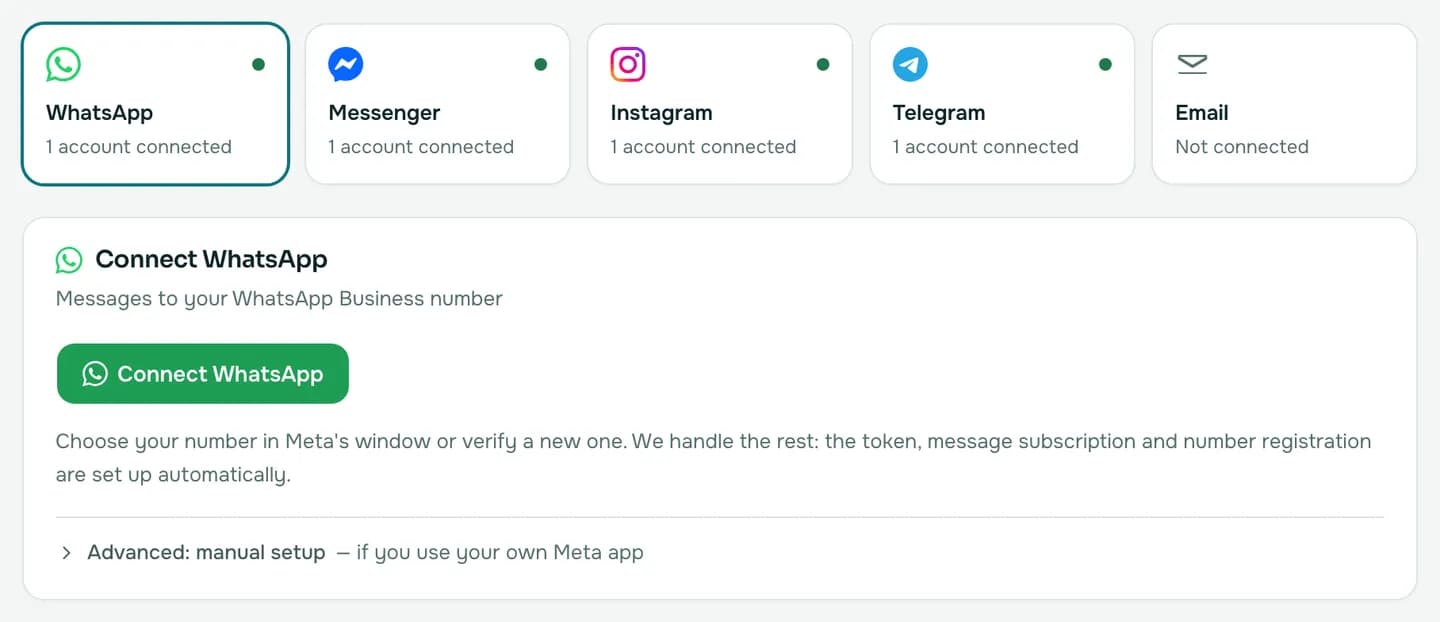
The Channels screen with WhatsApp selected: the green connect button and the manual setup option below it
Settings → Channels → WhatsApp

Once it's connected, send a message to the number from your own phone: within a few seconds it appears in your inbox as a new conversation. Replies you write in the dashboard reach the customer on WhatsApp.

WhatsApp doesn't allow free-form messages once 24 hours have passed since the customer's last message. In that case the dashboard doesn't send the message and explains why underneath it; you can reply as soon as the customer writes again.
  • “The window was closed or permission wasn't granted” — Meta's window was closed before the steps were finished. Click “Connect WhatsApp” again and go all the way through.
  • “This number is connected to another account” — the number is registered to another Revo Chat account and has to be removed there first.
  • If you use your own Meta app, follow the steps under “Advanced: manual setup” on the same screen.
Connecting your Facebook Page and Instagram account

“Connect with Facebook”: choose your Page, and Messenger plus the Instagram business account linked to it come along.

Messenger and Instagram messages come in through your Facebook Page. You set up the connection by signing in to Facebook and choosing your Page; the access token and message subscription are configured automatically.

  • You need to be an admin of the Facebook Page.
  • For Instagram, your account must be a professional account (business or creator) and linked to this Facebook Page.
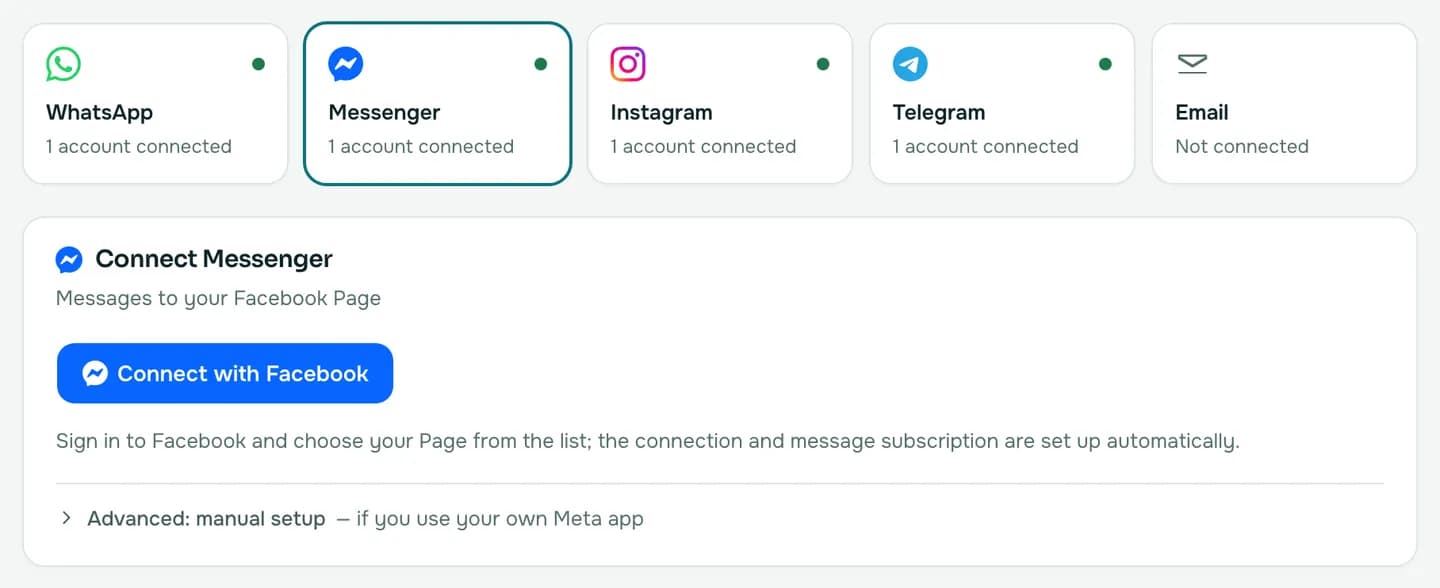
  1. In Settings → Channels, choose the Messenger or Instagram card.
  2. Click “Connect with Facebook” and sign in with the Facebook account that manages your Page.
  3. Approve the requested permissions. Back in the dashboard, the Pages you manage are listed.
  4. Choose your Page. Messenger is connected, and if the Page has a linked Instagram business account, that's connected too.
The Channels screen with Messenger selected: the blue connect-with-Facebook button
Settings → Channels → Messenger
On Messenger and Instagram you can reply freely within 24 hours of the customer's last message. After that, for up to 7 days, only agent replies are delivered; the AI assistant doesn't reply in that window. For older conversations the dashboard shows the reason under the message.
  • “No Page managed by your Facebook account was found” — the Facebook account you signed in with isn't an admin of any Page. Try again with an account that manages the Page.
  • “Facebook connection was cancelled” — the permission window was closed without approving. Click “Connect with Facebook” again.
  • If your Instagram account doesn't appear, make sure it's a professional account and linked to the Facebook Page you chose.

Connecting your Telegram bot

Create a bot with @BotFather and paste its token into the dashboard; we take care of the Telegram side.

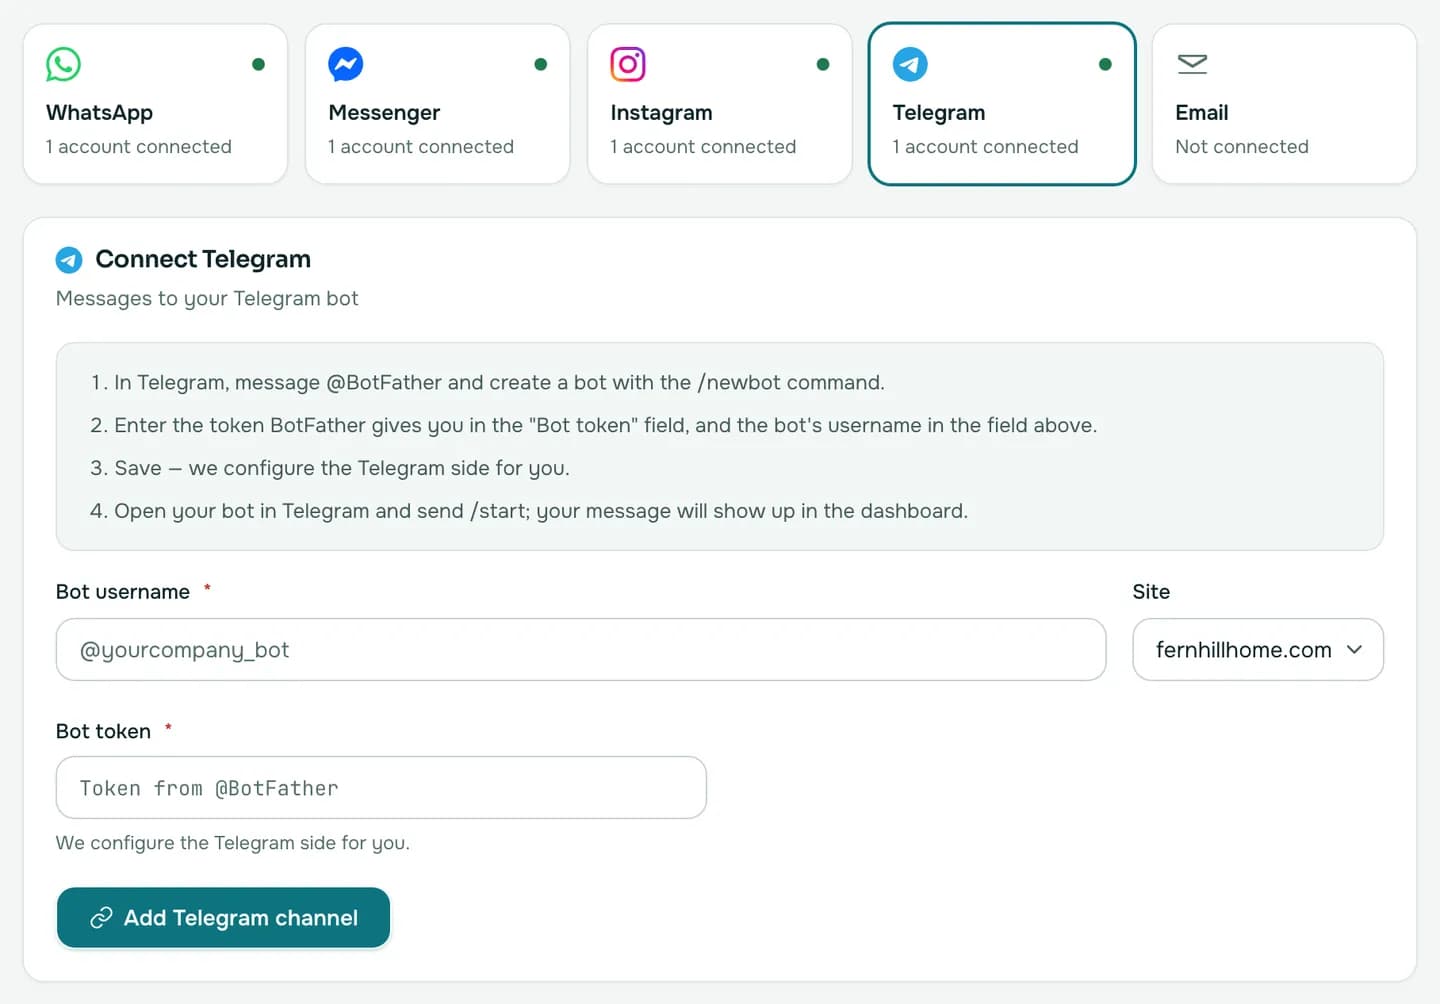
  1. In Telegram, message @BotFather and create a new bot with the /newbot command.
  2. Copy the token BotFather gives you.
  3. In Settings → Channels, choose the Telegram card and enter the bot username (e.g. @yourcompany_bot) and the token.
  4. Click “Add Telegram channel”. We set up Telegram to forward your bot's messages to us on your behalf.
  5. Open your bot in Telegram and send /start — your message lands in the inbox within a few seconds.
The Channels screen with Telegram selected: the step list and the bot username and bot token fields
Settings → Channels → Telegram

Connecting your support email address

Emails to your support address open as conversations; replies reach the customer by email.

The email channel opens emails sent to your support address as conversations in your inbox. Your agent's reply goes to the customer by email; when the customer replies, the answer comes back to your support address and lands in the dashboard (in the same conversation if it's still open).

  1. In Settings → Channels, choose the Email card, enter your support address (e.g. [email protected]) and add the channel.
  2. In the connected channels list, open “Setup details” on the channel's card and copy the endpoint address and verification secret.
  3. In your email provider or an email forwarding service, set up a rule that forwards every message sent to your support address to that endpoint in the format below.
POST request
POST <endpoint address>
X-Channel-Secret: <verification secret>
Content-Type: application/json

{
  "to": "[email protected]",
  "from": "[email protected]",
  "fromName": "Jane Doe",
  "subject": "My order",
  "text": "Hi, when will my order arrive?"
}
  • Replies are sent from Revo Chat's sending address with your site's name as the sender name; the “Reply-to” address is your support address.
  • Email has no read receipts; the tick under a message means it was accepted for delivery.
This setup needs a forwarding rule or service. If you get stuck, message us from the chat bubble at the bottom right and we'll set it up together.

Channel messages aren't coming in or going out

Check the status on the channel card and try “Test”; if a message wasn't delivered, the reason is shown under it.

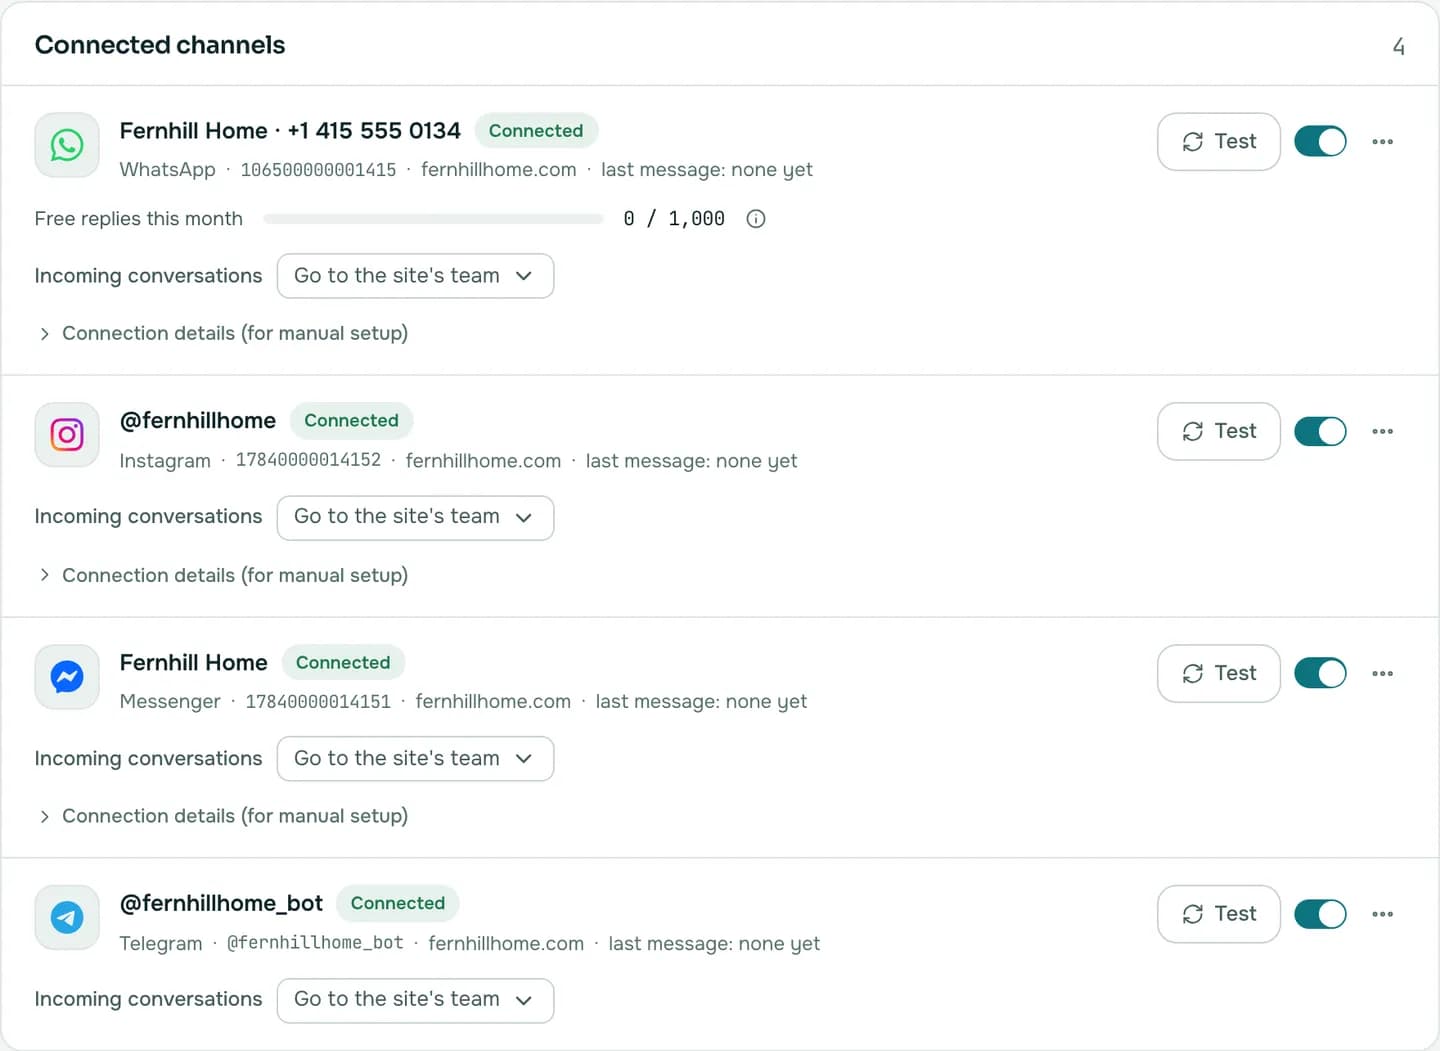
In the “Connected channels” list under Settings → Channels, each account's status is shown with a badge:

  • Connected — the token works and messages come and go.
  • Not tested — the account was added but the connection hasn't been tried yet; click “Test”.
  • Connection error — the token or permission is no longer valid; reconnect the channel.
  • Key needed — in a manual setup, the access token hasn't been entered.
  • Off — you turned the account off; no new messages arrive until you turn it back on.
The connected channels list: WhatsApp, Messenger, Instagram and Telegram accounts with a connected badge, a Test button on each row and a choice of which team receives incoming conversations
Settings → Channels → Connected channels
  1. Click “Test” on the channel card; the token and connection are checked again and the badge updates.
  2. If the badge says “Connection error”, reconnect the channel in one click (“Connect WhatsApp” or “Connect with Facebook”). The existing record is updated and your conversations stay where they are.
  3. If there's a red warning under a message you sent, it tells you why — for example the reply window has closed, or the channel is off or was deleted.
Use the “Incoming conversations” list on the channel card to choose which team receives this channel's conversations; if you don't choose one, they go to the site's team.